
Last updated October 16, 2026
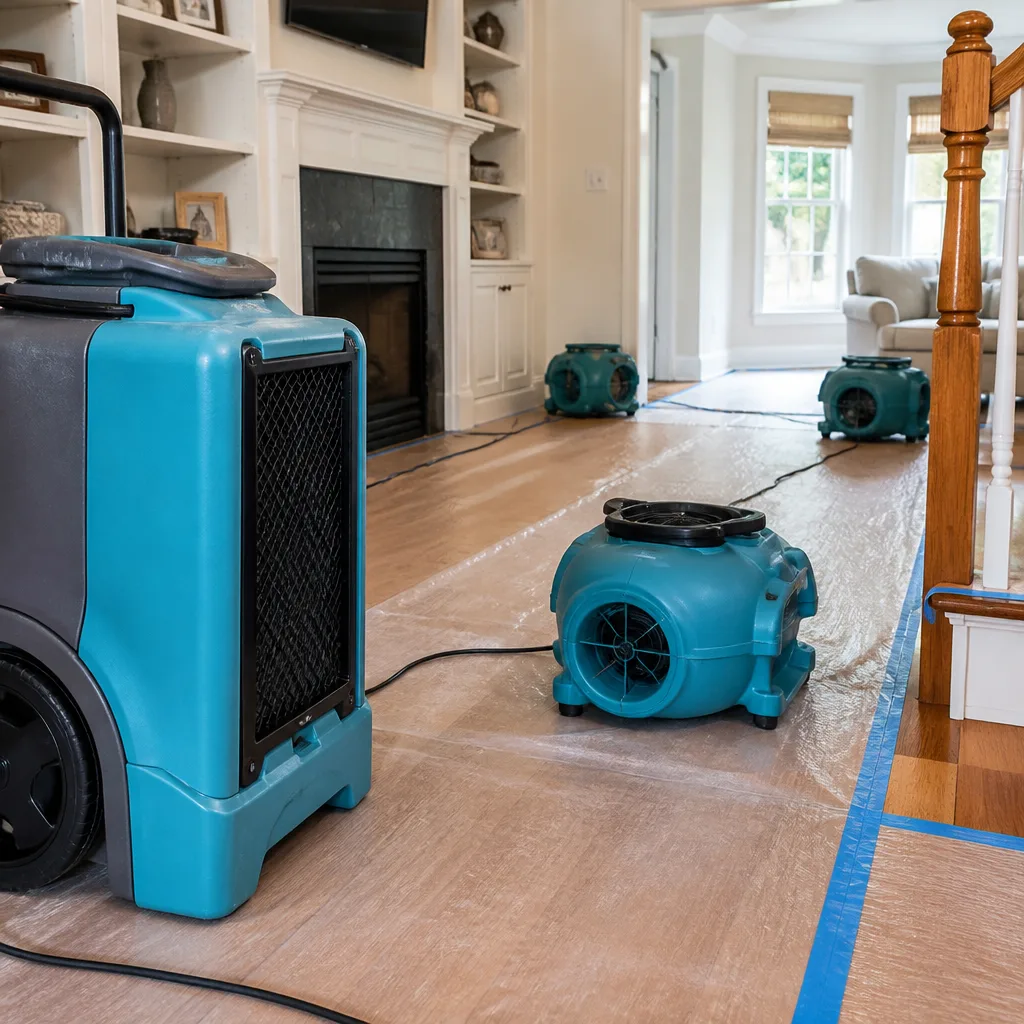 Water damage drying
 Fire & smoke cleanup
 Mold remediation
 Storm response
 Sewage cleanup
 Reconstruction
Free visual inspection and a written scope of work before any mitigation begins - photos, moisture readings, and drying logs go in your claim file
The scope we write is the scope we bill. Anything new gets shown to you, in writing, before we touch it.
Get your free estimateDIY vs Professional Damage Restoration: The Thousand Oaks Homeowner’s Decision Guide
California’s real estate disclosure laws force a reckoning that most homeowners never see coming. When you sell a home in Thousand Oaks, you must disclose known defects and past damage, including water intrusion and mold. Here’s the counterintuitive part: a homeowner who spent three weekends drying out a wall with box fans and a rented dehumidifier is often in a *worse* legal position at resale than one who called a professional, even when the visible result looks identical. It comes down to the paper trail. This guide draws a hard, factual line between the damage restoration tasks you can safely do yourself and the situations where going solo will cost you more than the professional ever would.
Restoration work we handle
Quick Answer
DIY damage restoration is safe and appropriate for small, clean-water spills under about 10 square feet where you can fully dry the area within 24 to 48 hours. Professional restoration is required when water came from sewage or appliances with contaminated water, when mold colonies exceed 10 square feet, or when moisture has entered wall cavities, subflooring, or insulation. In those cases, hiring a certified professional in Thousand Oaks protects both your health and your insurance claim.
Table of Contents
- What DIY Restoration Can Actually Handle (And When It’s Safe)
- The Three Situations Where DIY Always Fails
- The Equipment Gap: Why Consumer Gear Cannot Meet the Standard
- How DIY Work Affects Your Insurance Claim
- The California Resale Disclosure Problem
- Air Quality and Hidden Damage: What You Can’t See
- Thousand Oaks Specifics: Climate, Construction, and Code
- A Decision Framework for Thousand Oaks Homeowners
- Common Mistakes to Avoid
- When to Call a Professional
- Frequently Asked Questions
- The Bottom Line
What DIY Restoration Can Actually Handle (And When It’s Safe)
Let’s start with what you can do yourself, because calling a restoration company for every spilled glass of water would be absurd. The line between DIY and professional work is not about how handy you are. It’s about the category of water, the square footage affected, and the materials involved. Those three factors determine whether your efforts will actually solve the problem or just hide it.
The water category matters more than the volume. The IICRC S500 standard, which is the authoritative reference for professional water damage restoration, classifies water into three categories. Category 1 is clean water from a supply line, a faucet left running, or rainwater that hasn’t touched anything contaminated. Category 2 carries significant contamination, like washing machine overflow or dishwasher discharge. Category 3 is grossly contaminated, including sewage backup and floodwater from outside.
DIY is only worth considering for Category 1 water. Here are the specific tasks a homeowner can safely self-perform:
- Initial extraction with a shop vac: If you catch a clean-water spill while it’s still sitting on the surface of tile, vinyl, or sealed concrete, a wet/dry shop vac can remove the bulk of the water before it penetrates. Time matters: the window for surface extraction is measured in hours, not days.
- Surface-level cleaning of non-porous materials: Tile, porcelain, sealed concrete, and solid-surface countertops can be cleaned and dried without professional equipment, provided the water never reached the substrate beneath.
- Fan placement for minor surface moisture: If a small area of wall baseboard got splashed but the drywall above is dry to the touch and the moisture meter you can rent from a big-box store reads below 15% on the wall surface, a combination of household fans and open windows can finish the job.
- Removing wet area rugs and small mats: Non-structural textiles that you can carry outside to dry in the California sun are fair game for DIY.
But here’s the condition that makes each of those tasks safe: you must be able to fully dry the affected area within 24 to 48 hours and verify it with a moisture meter, not your fingertips. Your fingers are terrible moisture meters. They cannot tell the difference between 12% moisture content and 22%, and that difference is the line between a dried wall and a mold colony incubating inside your drywall. In Thousand Oaks, where summer temperatures regularly climb into the 90s, outdoor drying works. In winter, when overnight humidity rises, it does not.
If you cannot verify dryness with a meter, or if you cannot complete drying within two days, you’ve crossed out of DIY territory and into a situation where professional Water Damage Restoration in Thousand Oaks is the correct call.
The Three Situations Where DIY Always Fails
There are three scenarios where no amount of homeowner effort will produce an acceptable outcome. These are not debatable points. They are the situations where we’ve been called in after DIY attempts, and in every case, the homeowner spent money and time only to pay more for the eventual professional fix than they would have paid originally.
1. Category 2 or Category 3 Water
Sewage backup. Washing machine overflow that sat overnight. Toilet overflow that reached carpet. Floodwater from outside that came in through a door or window. These are all Category 2 or Category 3 events, and they carry bacteria, viruses, or chemical contaminants that require more than drying. The affected porous materials, including carpet pad, drywall, and insulation, must be removed and disposed of, not dried in place. The remaining structure then requires antimicrobial treatment under controlled conditions. A homeowner with a shop vac and bleach cannot achieve this. Bleach, for the record, is not an EPA-registered antimicrobial for porous surfaces and does not penetrate drywall or carpet. Using it on mold is like painting over rust.
2. Any Mold Colony Larger Than 10 Square Feet
The IICRC S520 standard draws a clear line at 10 square feet of visible mold. Below that threshold, a homeowner can clean non-porous surfaces like tile or glass with a detergent solution, and porous materials like drywall can be cut out and replaced. Above 10 square feet, professional mold remediation is required because the colony has established a network of spores and hyphae that extends well beyond the visible growth. Disturbing it with household cleaning releases those spores into your HVAC system and throughout your home. This is why professional Mold Remediation in Thousand Oaks involves containment barriers, negative air pressure, and HEPA filtration, measures that exist to protect the rest of your house from the remediation process itself.
3. Water Intrusion into Structural Cavities or Insulation
When water from a roof leak, a slab leak, or a failed window seal enters a wall cavity, it soaks whatever is inside: fiberglass batts or blown-in insulation, the back side of the drywall, and often the wood framing itself. None of that is accessible without removing the finished wall surface. DIY drying cannot work because you cannot get air to where the water is. The moisture will sit in that cavity for weeks, feeding mold growth and slowly deteriorating the framing. By the time the smell gives it away, the damage has compounded. We regularly see this in Thousand Oaks homes built in the 1960s and 1970s, where original windows and roofing have reached the end of their service life and water intrusion starts small and goes unnoticed for months.
The Equipment Gap: Why Consumer Gear Cannot Meet the Standard
Here’s a fact most homeowners don’t know: the professional drying standard is not “it feels dry.” The IICRC S500 standard defines a dry structure by moisture content measurements that must be taken with professional-grade moisture meters and verified against the moisture content of unaffected building materials in the same home. Your wall studs should measure within a few percentage points of a dry stud in an unaffected part of the house. That’s the standard. Achieving it requires moving air at a rate and volume that consumer equipment cannot produce.
A professional air mover from Phoenix or B-Air moves between 2,000 and 3,000 cubic feet of air per minute. A box fan from a hardware store moves 1,500 to 2,000 CFM on its best day, and it does so without the focused, directional airflow pattern that professional drying requires. The difference is not just volume; it’s the velocity of air moving across the wet surface, which is what drives evaporation.
The dehumidification side is more lopsided. A consumer dehumidifier removes 20 to 30 pints of water per day under ideal conditions. A professional low-grain refrigerant dehumidifier from Dri-Eaz removes 90 to 130 pints per day and operates at the specific humidity levels that drying science, called psychrometrics, requires. A consumer unit cannot get the relative humidity down to the 30% to 40% range that accelerates drying inside wall cavities.
There’s also the matter of equipment you’ve likely never heard of. Injectidry is a brand of injection drying systems that force air directly into wall and ceiling cavities without tearing out the drywall in every case. It’s specialized equipment that professional restoration companies use to dry structures from the inside out. You cannot rent this at a big-box store. And if you can’t dry the cavity, you’re left with exactly the situation described in the previous section: hidden moisture, mold growth, and a bigger problem in 90 days than you had on day one.
The RIA, or Restoration Industry Association, publishes certification standards for the people operating this equipment. The point of that certification is not to make technicians feel important. It’s to ensure that someone on the job understands what the moisture meter is telling them and can adjust the drying plan when the numbers aren’t moving. A fan and a dehumidifier in a room is not a drying plan. A drying plan is a documented process with daily moisture readings and a defined dry standard.
How DIY Work Affects Your Insurance Claim
Here’s where the DIY decision gets expensive in ways that have nothing to do with equipment. Your insurance policy requires you to mitigate damage, meaning you have to take reasonable steps to prevent further loss. But “reasonable steps” in the eyes of an adjuster are not the same as “any steps you took.” When you file a claim after doing DIY mitigation, the adjuster will ask specific questions, and your answers will determine how much of the claim gets paid.
What adjusters look for:
- Documented scope of loss: A professional restoration company produces a scope of loss, which is a written document describing exactly what was damaged, what was removed, and what was done to fix it. This document is formatted to match the line items on your insurance claim. A homeowner’s verbal description of “I dried it out with fans” does not satisfy this requirement.
- Moisture readings and drying logs: Adjusters want evidence that the structure was actually dry when the work stopped. Professional drying logs show daily moisture readings from multiple locations. Without them, an adjuster can argue that your DIY drying was incomplete and that subsequent damage, like mold, is a result of your negligence rather than the covered event.
- Causation evidence: The adjuster needs to prove that the damage you’re claiming was caused by the covered event, not by something else. Professional documentation shows the progression from initial damage through mitigation to final repair. DIY work blurs this chain of evidence.
The hard truth is that undocumented mitigation is regularly used as grounds to reduce or deny a payout. An adjuster who sees a homeowner-dried room with no moisture readings, no photos of the initial damage, and no scope of loss has a defensible reason to argue that the damage was either not as severe as claimed or was exacerbated by improper drying. You can fight that argument, and you might win, but you’ll be fighting it from a weakened position.
A professional job file prevents this loss of leverage. The documentation includes before, during, and after photos, moisture readings at defined intervals, equipment placement records, and a written detailed scope of loss. Every job at Keegan Restoration Thousand Oaks is recorded and formatted to support your insurance claim because the documentation is the product as much as the drying is. It is the thing that makes an intangible outcome, like a dry wall cavity, provable to a third party.
The California Resale Disclosure Problem
California Civil Code Section 1102 requires sellers to complete a Transfer Disclosure Statement, or TDS, disclosing all known material defects. That includes past water damage, past mold, and any repairs or remediation work done to address them. The word “known” does most of the heavy lifting here, and it’s where DIY homeowners get into trouble.
If you hired a professional for mold remediation, you have a work order, a scope of loss, and a completion report. You disclose the issue and attach documentation showing it was professionally remediated. That’s a clean disclosure. The buyer sees a problem that was properly addressed.
If you DIY-remediated mold that was larger than 10 square feet, here’s your disclosure position: you know there was mold, because you removed it. You know mold can recur if remediation is incomplete, because that’s true regardless of your skill level. But you have no documentation proving the remediation was effective. No post-remediation clearance testing. No moisture readings. No proof that the colony was fully removed and the moisture source eliminated. Your disclosure says, essentially, “There was mold, and I cleaned it up myself.”
That disclosure red-flags the transaction. It invites the buyer’s inspector to look harder, invites the buyer’s agent to ask for a professional mold inspection, and invites the buyer to demand a price reduction or a credit for professional remediation as a condition of closing. And if the mold recurs after the sale, the buyer has a document proving you knew about it, and you have no document proving you fixed it correctly. That’s the worst legal position a seller can be in.
The same logic applies to water damage that was dried without documentation. A buyer who discovers evidence of past water intrusion, say, staining on subfloor visible from a crawl space, will ask whether it was addressed. “I dried it with fans” is not an answer that closes the deal.
Air Quality and Hidden Damage: What You Can’t See
The damage you can see is only a fraction of the problem. Water moves through a structure by gravity and by capillary action, which pulls moisture into porous materials sideways and upward. A spill on a kitchen floor penetrates the tile underlayment, wicks into the base of the drywall, and travels along the bottom plate of the wall framing. You see a wet spot on the floor. What’s happening inside the wall is invisible.
This is why we talk about air quality as a restoration issue, not just a comfort issue. Mold growing inside a wall cavity releases spores and microbial volatile organic compounds, or mVOCs, into your indoor air. The health effects range from allergy-like symptoms to more serious respiratory issues for people with asthma or compromised immune systems. The EPA’s guidance on indoor mold is blunt: the only way to control mold growth is to control moisture. If moisture inside a cavity is never addressed, the air quality problem compounds silently.
Professional restoration addresses this through psychrometrics, the science of how air temperature, humidity, and moisture content interact. A professional drying plan uses this science to calculate exactly how many air movers and dehumidifiers are needed for a given space and a given moisture load, then adjusts daily based on measurements. It’s not guesswork, and it’s not “put a fan on it.” It’s a calculated process with a defined endpoint.
The other thing professionals do is find the water you didn’t know about. Moisture meters read through drywall. Thermal imaging cameras show temperature differences that indicate wet insulation. A professional inspection after any significant water event identifies the full extent of the damage before drying begins, so there are no surprises six weeks later when the smell shows up.
Thousand Oaks Specifics: Climate, Construction, and Code
Thousand Oaks has a Mediterranean climate: hot, dry summers and mild, occasionally wet winters. That sounds like good drying weather, and in the summer it is. But the winter picture is different. When winter storms roll in off the Pacific, relative humidity can sit above 70% for days at a time. That’s when indoor water damage from roof leaks, window failures, and blocked drainage systems happens. And it’s exactly the time when passive drying, opening windows and setting out fans, does not work because the outdoor air is already saturated.
The housing stock matters too. Much of Thousand Oaks was built in the 1960s through the 1980s, a period when single-pane aluminum windows, composition shingle roofs, and cast-iron plumbing were standard. Those original windows and roofs are now past their expected service life. We see a steady stream of water damage calls in neighborhoods like Newbury Park, Lynn Ranch, and Wildwood from exactly these failure modes. A 1970s window that leaks during a winter storm sends water into the wall cavity behind the stucco, and stucco holds moisture against the framing longer than most siding materials. That’s a textbook, and expensive, hidden-damage scenario.
Permits add another layer in Thousand Oaks. Any work that involves structural repair, meaning the framing or the shear wall, requires a permit from the City of Thousand Oaks Building Division. A DIY repair that removes drywall, dries a cavity, and patches the wall without a permit is an unpermitted repair. At resale, an unpermitted repair that addressed a disclosed defect is another item for a buyer’s agent to exploit. Professional restoration companies that operate to the Garrison Standard coordinate permits when required, so the repair is documented and legal, not just effective.
Thousand Oaks also sits in a wildfire-adjacent zone, which is why our Fire Damage Restoration in Thousand Oaks service exists for more than just house fires. Smoke and soot from nearby wildfires infiltrate homes through eaves, vents, and door gaps. The residues are acidic and chemically active, not just unsightly. Professional smoke and soot removal uses specialized chemical sponges and HEPA vacuuming that consumer cleaning products cannot replicate. This is damage restoration in Thousand Oaks as a year-round reality, not a seasonal concern.
A Decision Framework for Thousand Oaks Homeowners
If you’re standing in two inches of water right now or staring at a dark patch on your wall, here’s the practical decision framework that cuts through the noise. We’ve organized it as a numbered decision tree you can work through in about five minutes.
- Identify the water source and category. Is it from a supply line, a toilet, an appliance, or outside? If it’s anything other than a clean supply line, you’re dealing with Category 2 or 3 water, and DIY is off the table. Call a professional.
- Estimate the affected square footage. Measure the visible wet area. If it’s larger than 10 square feet, roughly the size of a standard interior door, professional equipment is required to achieve the drying standard. DIY fans and dehumidifiers cannot move enough air to dry a larger area in the required time frame.
- Determine whether moisture has entered any cavity. Is the water near a wall? Has it been sitting for more than a couple of hours on carpet or wood flooring? If you answered yes to either, water has likely penetrated beneath the surface, and DIY drying cannot reach it.
- Check your timeline. Professional drying targets 3 to 5 days. DIY drying of a modest spill needs 24 to 48 hours of continuous fan and dehumidifier operation. If you can’t commit to that, or if the weather in Thousand Oaks is humid, you cannot win this one alone.
- Consider your insurance position. If you’re planning to file a claim for this damage, professional documentation protects your payout. If you’re planning to sell your Thousand Oaks home in the next five years, professional documentation protects your disclosure position. These concerns swing otherwise marginal cases toward professional help.
- Make the call. If any of the first five steps pushed you out of DIY territory, call a professional before the damage compounds. The Keegan Restoration Thousand Oaks home team can walk you through what you’re seeing and whether professional service is warranted, with a written price before any work begins.
This framework is not plucked from thin air. It’s the practical application of the IICRC S500 and S520 standards that professional restoration companies follow. For a deeper dive into ongoing prevention, see our Water Damage Restoration Maintenance Checklist for Thousand Oaks Homeowners. The standards exist because decades of real-world failures showed what happens when water damage is not dried to a defined, measurable endpoint: mold, structural decay, and expensive re-remediation. The framework keeps you on the right side of those standards.
Common Mistakes to Avoid
- Waiting to see if it dries on its own. A wall cavity that got wet during a Thousand Oaks winter storm will not dry on its own before mold begins to colonize. The IICRC standard for mold prevention is drying within 24 to 48 hours. Waiting a week to “see what happens” guarantees what happens.
- Using bleach on mold. Bleach is not an EPA-registered antimicrobial for porous surfaces. It does not penetrate drywall, wood, or carpet. What it does do is add water to the affected material and create a false sense of completion. Professional mold remediation uses registered biocides and, more importantly, physical removal of affected materials.
- Running a household dehumidifier without air movement. Dehumidification without rapid air movement across wet surfaces is like wringing out a sponge without first getting it wet, you’re removing moisture from the air, not from the wall. Professional drying always pairs high-CFM air movers with dehumidification.
- Covering up the problem with new paint or flooring. Painting over a water stain or laying new flooring over a damp subfloor seals moisture in place and accelerates the damage. When the problem eventually surfaces, and it will, the repair is larger and the insurance claim is older and harder to prove.
- Dismissing a small water stain as “probably fine.” A small stain on a Thousand Oaks ceiling often means a roof leak that has been slowly saturating the attic insulation for weeks. The stain is the tip. The insulation above it is the iceberg.
- Not documenting your DIY work. Even if a DIY task is legitimate, take photos before, during, and after. Note the date, the source of the water, and the steps you took. If you ever need to file a claim or complete a disclosure form, those photos are your only evidence.
- Renting equipment without a moisture meter. Big-box stores will rent you a dehumidifier and a fan. They will not lend you the training to know whether your drying attempt worked. Without a moisture meter and a clear dry standard, you’re guessing, and guessing is how hidden mold problems start.
When to Call a Professional
Call a professional when the water is contaminated, when the affected area exceeds 10 square feet, when moisture has entered a wall, floor, or ceiling cavity, when you plan to file an insurance claim, or when you plan to sell your home in the future and need documentation that the work was done right. Also call when you simply don’t have the time to run fans and monitor moisture for multiple days, because an unattended drying attempt is a failed drying attempt. Keegan Restoration Thousand Oaks offers free estimates in Thousand Oaks, and a live person answers the phone 24 hours a day, every day, including weekends and holidays. Call (805) 309-3324 and describe what you’re seeing. We’ll tell you honestly whether you need professional service or whether your situation is DIY-appropriate.
Frequently Asked Questions
Professional water damage restoration in Thousand Oaks typically ranges from $1,500 to $5,000 for a single-room, clean-water event where drying is completed in 3 to 5 days. Larger events involving multiple rooms, sewage contamination, or structural drying range from $5,000 to $15,000 or more. These are realistic ranges for a professional job with documented moisture readings, not a flat-rate guess, and your insurance typically covers most of the cost when the event is covered. Call (805) 309-3324 for an exact quote, estimates are free.
Insurance will still consider your claim after DIY mitigation, but the lack of professional documentation can weaken it. Adjusters ask for moisture readings, drying logs, and a scope of loss to verify the damage and confirm it was fully mitigated. Undocumented DIY work gives an adjuster a defensible reason to question the extent of the damage or argue that incomplete drying caused secondary mold. A professional job file prevents that outcome because the documentation matches what the adjuster needs to see.
Keegan Restoration Thousand Oaks answers calls with a live person 24 hours a day, 7 days a week, and dispatches technicians from a local Thousand Oaks location on the same call. For active water damage, speed matters because the window to prevent mold is 24 to 48 hours. For mold remediation and fire damage restoration, the timeline is scheduled and scoped in writing before work begins, those are not emergency dispatches, and the work is priced the same way.
If the water was clean and the affected area is under 10 square feet and fully dry within 48 hours, a thorough surface cleaning is generally sufficient. If the water was contaminated, if the affected area is larger than 10 square feet, or if moisture has entered a cavity, full remediation is required because a surface cleaning cannot reach the contamination or moisture that is already inside the building materials. A professional assessment with a moisture meter answers this question definitively in about 20 minutes.
A professional restoration company should provide documentation that supports your claim directly: photos, moisture readings, a written scope of loss, and drying logs. You submit that documentation to your adjuster, and the job file does the persuading. At Keegan Restoration Thousand Oaks, every job is recorded and formatted to support your insurance claim, which means the documentation speaks the adjuster’s language and covers the line items they need to approve. Call (805) 309-3324 to discuss your specific situation.
You can attempt DIY drying for a clean-water spill that is under 10 square feet, has not penetrated walls or flooring cavities, and can be fully dried within 24 to 48 hours. The catch is that you must verify dryness with a moisture meter, not by touch, and consumer dehumidifiers cannot reach the low relative humidity that professional drying requires for cavity work. If any of those conditions fails, a professional with IICRC-standard equipment is the correct call.
The Bottom Line
The DIY-versus-professional decision in damage restoration is not about whether you can swing a hammer or run a shop vac. It’s about whether you can hit a measurable dry standard within a defined time frame, and then prove you did it. For small, clean, surface-level spills, you can. For Category 2 or 3 water, mold over 10 square feet, or moisture in structural cavities, you cannot, and attempting it creates a problem that compounds in your walls, in your insurance claim, and in your resale disclosure. In Thousand Oaks, where winter humidity and aging housing stock make hidden moisture a persistent threat, the disciplined move is to know the line and call a professional when you cross it. Explore more guides & resources to protect your home and investment.
Written by Shane Pruitt, Owner at Keegan Restoration Thousand Oaks, serving Thousand Oaks since 2005.
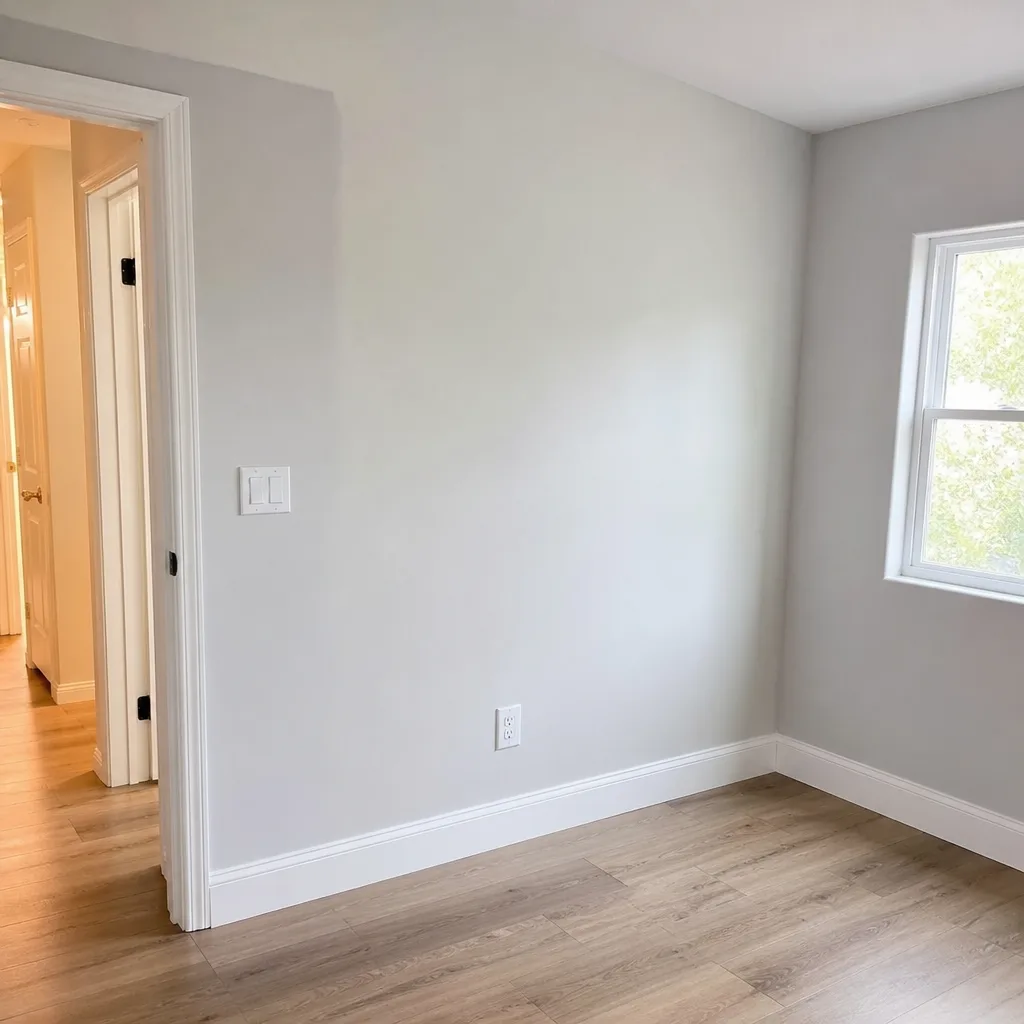
See the difference
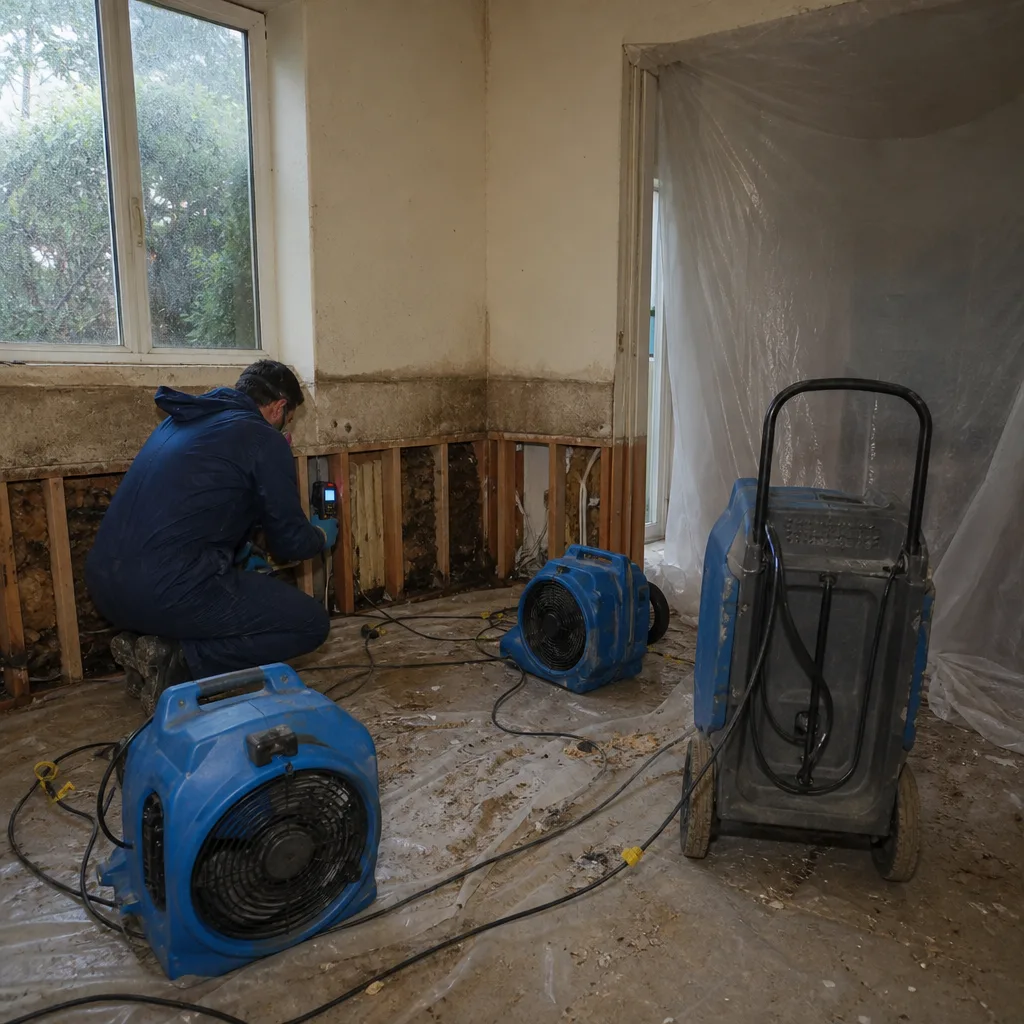 Before
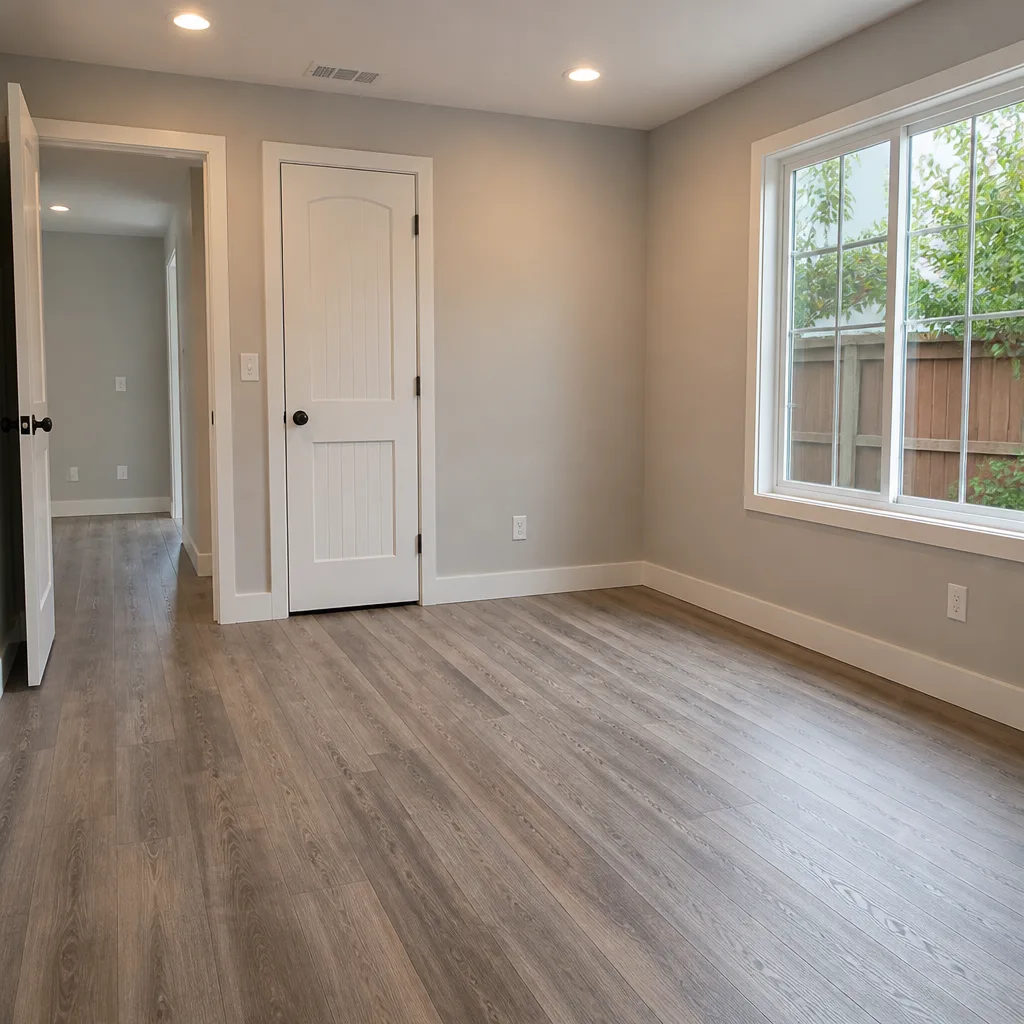 After
After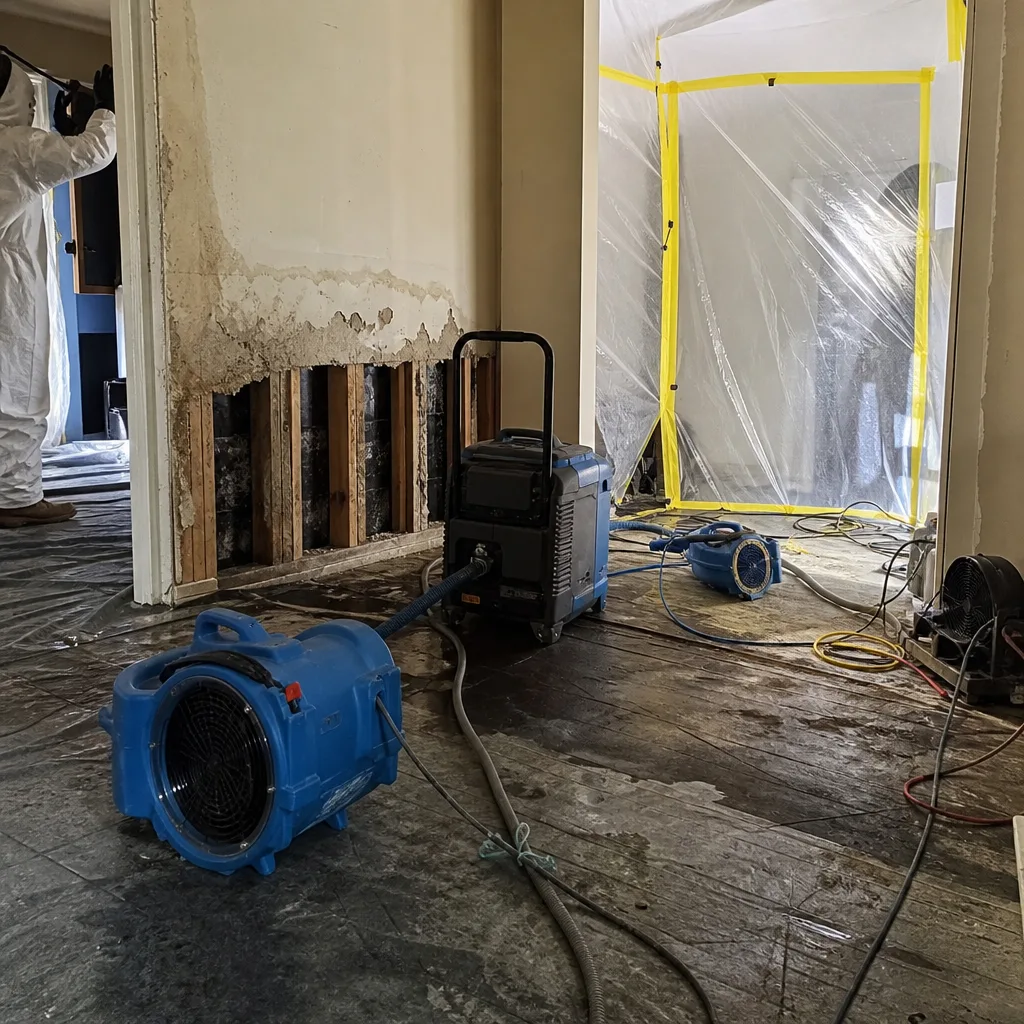 Before
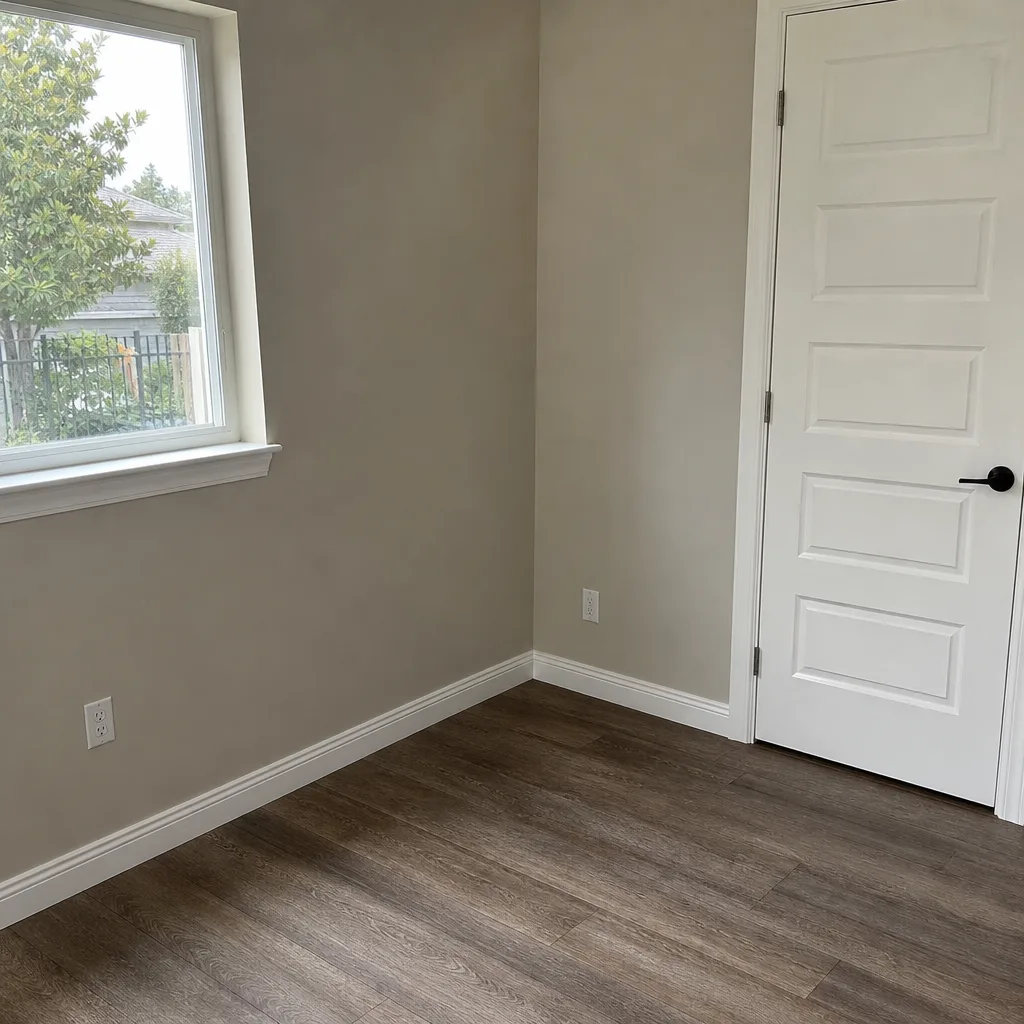 After
After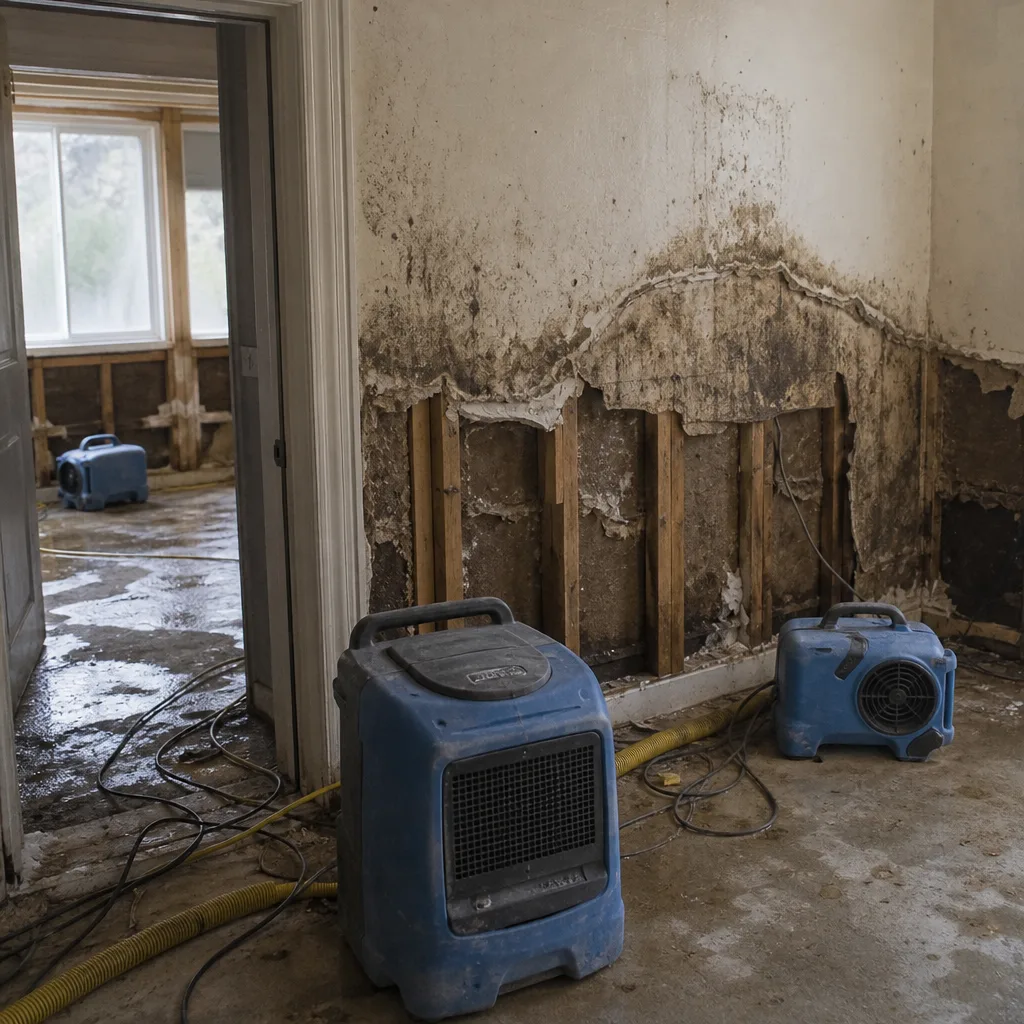 Before
 After
After